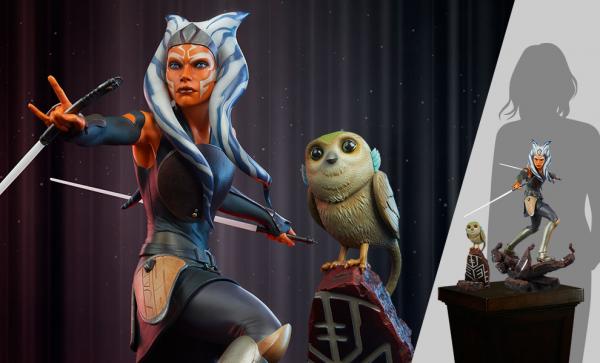
Star Wars: Ahsoka Season 1 Episodes 1 and 2 Review
It’s here! Ahsoka™, the latest live-action fare in the vast Star Wars™ universe, is here to rock our galactic socks off. So far, so spectacular. This double-episode premiere does a solid job laying the groundwork for the series and bringing familiar faces into the live-action fold (Sabine Wren™, Hera Syndulla™, Governor Azadi™, Huyang™, etc.). It boasts a vibe that’s a mixture of Andor™ and The Mandalorian™. The series strikes that sweet spot between the two.
Rosario Dawson is a wonderful live-action Ahsoka Tano™ (although I’d love to see her original voice actor, Ashley Eckstein, appear at some point). The action sequences for these episodes are on-point, with thrilling special effects that really immerse you in this world.
Episode 1 “Part One: Master and Apprentice”

We open with the standard Star Wars crawl in red, describing how the Empire has fallen and we’ve entered the age of the New Republic. Ahsoka Tano has captured one of Grand Admiral Thrawn’s™ allies and learned of the plan to free him from banishment. A map leads to his location, which she now searches for, while her prisoner, Morgan Elsbeth™, is currently awaiting trial.
Speaking of trial, we see the transport ship where Morgan is held captive. Baylan Skoll™ and Shin Hati™ initially pose as Jedi™ before switching gears and killing everyone on said ship. It’s a bold way to introduce our antagonists, and I love it. Baylan frees Morgan per his deal, and the trio escapes, leaving carnage in their wake.
Finding the Map

Meanwhile, Ahsoka walks through the ruins of a shrine on Arcana™, a Nightsister™ colony (you might’ve heard of the Witches of Dathomir™ in Star Wars: Rebels™ and Star Wars: The Clone Wars™). She successfully nabs an orb that holds the map to Thrawn’s location (and potentially Ezra Bridger’s™). After emerging from the cavern where the orb was sealed, Ahsoka battles a handful of enemy droids who aim to ensure she never leaves the colony with the map.
Once Ahsoka sees they’re enacting self-destruct measures, she runs away from the explosion as fast as she can. Thankfully, Huyang (last seen in The Clone Wars) rescues her. Side note: David Tennant’s voice is so distinct, even when not speaking in his natural Scottish brogue. I love it.
Ahsoka scolds Huyang for being too far away from her while she hunted for the orb. The droid claims he merely adhered to Jedi protocol, while Ahsoka does all she can to distance herself from that part of her life. She is a former Jedi, after all. Hey, sometimes you have to break a few rules to get the job done.
Reuniting With Old Pals

Next, Ahsoka reunites with General Hera Syndulla. Our girl has finally made her live-action debut, and she looks great. Ahsoka shows Hera the orb, but they can’t unlock it — not even Huyang. Hera suggests Ahsoka take it to Sabine Wren; however, Ahsoka and Sabine are not on the best terms.
Then, we see Governor Azadi (played by Mr. Krabs! Clancy Brown) deliver a speech to honor Ezra and his sacrifice to drive out Imperial forces from Lothal™. He introduces Commander Sabine Wren, who significantly contributed to the Rebellion’s success along with the Ghost crew™. However, Sabine is nowhere to be found. Azadi sends his staff to search for her while thrusting one unlucky senator into the spotlight. I hope you’re great at improvising, bud.

Sabine rides her bike while blasting rock music, one of my favorite live-action character introductions thus far. Azadi’s crew circles her on their ships, reminding her she’s supposed to speak at the commemoration event. Sabine skillfully thwarts them, though, and heads home.
A Beacon From the Past
Sabine pets her adorable Loth-cat™ before watching a hologram message from Ezra. He apologizes for not being there, but as a Jedi, sometimes you must do the right thing, even if it’s the hard thing. He encourages Sabine to push forward and fight the good fight. Meanwhile, Baylan, Shin, and Morgan arrive at the Arcana shrine to find the orb is MIA. And here they thought Ahsoka wouldn’t find it. Morgan explains the history of this place to Shin and that she’s a Nightsister (a witch). Morgan sends Shin to hunt for Sabine.
Meanwhile, Sabine spots Ahsoka’s ship and runs to meet her. Governor Azadi urges Sabine to hear Ahsoka out. Sabine finds her old bunk with Loth-cat drawings etched into the wall. She smiles. Ahsoka explains that Thrawn survived the Battle of Lothal™, and the orb holds the key to his location. Thus, there’s a good chance Ezra survived, too.
The former Jedi master and apprentice start bickering while the tension boils between them. Sabine is bitter about not getting adequate training from Ahsoka. Still, Sabine continues to examine the orb for a way to unlock it.
Who Is Baylan Skoll?
Later, Huyang pulls Ahsoka aside to reveal a development in his research. He used to train younglings on how to assemble lightsabers™. Though he doesn’t recognize Shin Hati’s lightsaber, he’d know Baylan Skoll’s anywhere. He’s never seen such a saber in 500 years. Huyang warns they’ll be formidable adversaries if both are trained in the Jedi arts. Ahsoka calls out to Sabine to relay this information, but Sabine is gone, along with the map.
Tracking the Orb
Shin sends a tracker to locate Sabine’s (and the orb’s) location. Sabine tries to unlock the orb. She does bring up a hologram of a bunch of standing rocks à la Stonehenge. Ahsoka chats with Hera’s hologram, revealing Sabine took the orb when she expressly forbade it. She vents about how difficult Sabine is. Hera jokes that Ahsoka was probably a handful for her own master. Of course, we know who her master was. Ahsoka replies that Anakin Skywalker™ left the Jedi ways behind him before she finished her training.
Attacking Sabine
Next, after some brainstorming and scribbling, Sabine finally unlocks the map. Her success is short-lived, though, as a few droids descend upon Sabine. They destroy her equipment and research. They also steal the orb. Sabine manages to overpower the droids before coming face-to-face with Shin Hati. Sabine whips out Ezra’s green lightsaber while Shin unleashes her orange-bladed one. They battle it out, and folks, it is epic. Fortunately, Sabine had time to call for reinforcements before facing off against Shin. We see Ahsoka and Huyang’s ship from a distance. Shin utilizes the little time she has left to stab Sabine and flee, orb and all. Sabine collapses on the ground. Uh-oh.
The episode ends with “For our friend, Ray,” for Ray Stevenson (Baylan Skoll), who passed away in May. I definitely teared up when I saw that.
Episode 2 “Part Two: Toil and Trouble”
Sabine wakes up in a hospital room after Shin Hati stabs her. She tells Ahsoka she unlocked the orb before she was attacked. Unfortunately, Shin stole the map and her droids destroyed Sabine’s equipment. Ahsoka departs, but not before telling Sabine she’s “done enough.” This could be interpreted as a compliment or an insult (or a “complisult,” as coined in Community). Meanwhile, our duo of baddies stands in the middle of Star Wars Stonehenge. Baylan whips out the orb and places it on one of the rocks while Shin watches.
Examining the Aftermath
Ahsoka heads to Sabine’s apartment and examines the wreckage. She finds one of Shin’s droids, who stayed behind to ensure no one would return. Ahsoka brings the droid’s head to Sabine. Sabine believes she can access its knowledge to track the orb’s location and save her research. Sabine discovers the droid came from Corellia™ — the New Republic shipyard. Ahsoka adds that Morgan Elsbeth had factories on Corellia. She thinks they could find something of use there. Hera reassures Sabine that she did well. Sabine wishes Ahsoka would understand this, but Hera believes Sabine needs to hear it from an outsider’s perspective.
Finding Thrawn

Morgan arrives at Star Wars Stonehenge and utilizes her witch powers to unlock the orb. We see what Sabine described in the hospital — two galaxies with a “pathway” between them (the World Between Worlds™?). However, Morgan focuses on the current galaxy, which holds the coordinates to where Thrawn is. It’s gorgeous. Shin asks what will happen once they find Grand Admiral Thrawn. Baylan promises her she’ll have access to power, the likes of which she’s only dreamed of.
Scouring the Shipyard
Later, Ahsoka and Hera arrive on Corellia, where Myn Weaver™ greets them. He gives them the grand tour. Everything they’re seeing is now under New Republic rule. Even former Imperial loyalists are working for the New Republic. While they travel to Morgan’s former facilities, Hera broaches the subject of resuming Sabine’s training. She thinks Ahsoka should give it another go.
Meanwhile, Huyang has a blatantly honest conversation with Sabine about the same thing. Maybe it’s time to keep training with Ahsoka. He encourages her to embrace Ezra’s lightsaber as hers now.
A Teeny-Tiny Uprising

Next, Ahsoka and Hera walk through Morgan’s main facility. Myn reveals factoids about it, managing to answer all of their questions. Hera points out the old hyperdrive core that’s now New Republic property. Things get sticky when General Syndulla asks for access to certain information. Myn reveals he can’t give her that access and, apparently, her general status can’t override those locks. Ahsoka and Hera seem suspicious that former Empire droids are suddenly pro-New Republic now. Myn insists they don’t have battle droids, though.
Suddenly, a ship leaves with the hyperdrive core. Hera orders an employee to hail them back, but she reveals they’ve been cleared for departure. Then, one man shouts his devotion to the Empire. Ahsoka kills him on the spot. Ahsoka and Hera kill all the Imperial loyalists present.
Hera and Chopper™ chase down the departing ship while Ahsoka stays on the ground, fighting an assassin droid as well as Marrok™, a mysterious red lightsaber-wielding associate of Baylan and Shin. Naturally, she kicks ass. Chopper successfully plants a tracking device on the ship, too. Huzzah!
Assembling the Armor

Sabine returns home, reuniting with her Loth-cat (I’m glad the good boy survived!). She pulls out her Mandalorian™ armor, including her helmet. Then, she chops off her hair. Meanwhile, Ahsoka and Hera watch as Myn and his associates are arrested for their loyalty to the Empire. Hera wonders what keeps one loyal to such a cause. Ahsoka reveals it’s not loyalty; it’s greed. That’s deep.
Later, Ahsoka meets with Sabine, who boasts her Mandalorian armor and a sick new haircut. Ahsoka compliments it. Sabine reveals she’s ready to resume training, eradicate Thrawn, and find Ezra. Sabine touches the iconic Rebels mural of the Ghost crew, specifically Ezra’s face.
Leaving Together
Ahsoka and Sabine depart Lothal, making a beeline for the Denab™ system, where the transport ship was spotted. Huyang informs them that it’s in the orbit of Seatos™. Ahsoka orders Sabine to take them out and follows the order with “Padawan™.” Aw. They’re mending fences.
Elsewhere, Baylan and Shin chat with Morgan via hologram. She tells them they’re installing the final hyperdrive, and the Eye of Sion™ (a large starship) will be complete. Then, they can bring Thrawn home. Baylan warns Morgan that Ahsoka is coming despite Shin’s insistence that she can’t track them. Baylan knows he’ll have to kill her, and he doesn’t take that much pleasure in removing the last Jedi.
What are your predictions for the rest of the season? Will our heroes defeat Thrawn and locate Ezra? Become one with the Force with other fans at side.show/geekgroup or in the Sideshow Social Network, and don’t forget to Let Your Geek Sideshow!
By Melody McCune

Connect with Melody
More from Melody
- Lanterns Season 1 Finale Review: Fear Is Power
- 10 Non-Gory Halloween Movies for a Macabre Marathon
- 12 Halloween-Themed Disney Movies to Get Your Spooky On
- The Top 10 Halloween Movies from the ’90s
- Tuning in to the 5 Best MCU Live-Action TV Shows
✍️ Written by Humans, Not AI
Related Products