Star Wars: Ahsoka Season 1 Episode 4 Review
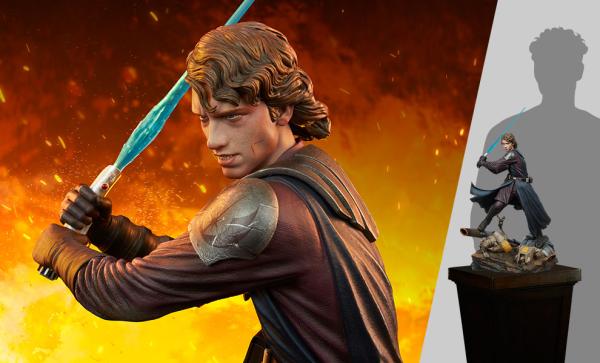
Star Wars: Ahsoka™ debuts its strongest outing yet with “Part Four: Fallen Jedi.” In fact, it’s one of my favorite Star Wars™ live-action episodes thus far (along with all of Andor™). We not only get two badass lightsaber™ duels, but we’re blessed with the live-action introduction of the World Between Worlds™ and a certain character’s thrilling return — Anakin Skywalker™. Well, he’s dead, but he’s chilling in the WBW, so he looks very much alive. At least I don’t think Ahsoka is retconning Vader’s™ actual death.
Although perhaps Anakin is a time traveler of sorts, which is possible in the World Between Worlds, and we’re seeing the version of him before his dark side transition.
Fervent theorizing aside, this week’s Ahsoka episode keeps its foot on the gas from beginning to end, never once losing momentum. It’s brimming with thrills, plot twists, excellently choreographed lightsaber battles, stunning visuals, and a commanding performance from the late Ray Stevenson. Seriously, he’s such a nuanced, compelling villain.
Part Four: Fallen Jedi
We open with Huyang™ conducting repairs on the comms while Sabine Wren™ attempts to contact Hera Syndulla™. Unfortunately, her efforts are futile. Sabine heads outside the Fulcrum™ and informs Ahsoka Tano™ that Huyang’s still trying to fix the comms and the power converter. They’re not leaving anytime soon. Ahsoka reveals if they can’t save Ezra Bridger™, they might have to ensure no one else can. Why? Because it’s the only way to stop Grand Admiral Thrawn’s™ return to power.
Of course, Sabine doesn’t like hearing that, but she reassures her master that they won’t fail. She and Ahsoka discuss their impending trek to the ground base, where the map to Thrawn’s location is being held. They know where it is now.
Take Them Out

Meanwhile, Shin Hati™ informs Baylan Skoll™ and Morgan Elsbeth™ that they’ve located Ahsoka and her crew. Baylan urges his apprentice to make damn sure our heroes don’t get far in their mission to steal the map. After Shin departs, Morgan notes a hint of what she perceives is fear in Baylan’s voice; however, he insists it’s merely “experience.” He knows Ahsoka is a formidable Jedi™.
Back at the Fulcrum, Ahsoka notices Sabine nervously searching for a weapon component. Ahsoka finds it in seconds. She wonders aloud whether she should worry about Sabine before dropping another piece of advice: Sometimes, you have to do the right thing regardless of your personal feelings. Sabine cares for Ezra but might have to set that aside for the greater good.
The Enemy Approaches

While outside, a droid from the enemy camp attacks Huyang. Ahsoka and Sabine launch into fight mode, seamlessly destroying the multiple droids in their path. After the brief skirmish, Huyang bids our titular master and her apprentice farewell. He urges them to work in tandem. They’re at their best when they’re together. Uh-oh. This definitely means they’re splitting up, inadvertently or intentionally.
Elsewhere, Hera is told to stay put, but she can’t sit idly by while her friends struggle. She orders her lieutenant to oversee matters while she’s away. Then, she hops on a ship with her son Jacen™ and droid Chopper™. We see she’s flanked by some T-65B X-wing starfighters™, with none other than Captain Carson Teva™ leading the charge. He’s back! I love seeing him cross over from The Mandalorian™ to Ahsoka. The group launches into hyperspace before they’re stopped.
The Depths of the Void

Next, back at Star Wars Stonehenge, Baylan reminds Morgan that if her calculations are off even slightly, they’ll be lost in “the depths of the void.” We learn her droids are hard at work in retrieving the hyperspace coordinates from the map. This will lead them to Thrawn’s location. Meanwhile, Ahsoka and Sabine come face-to-face with Shin and Marrok the Inquisitor™ in the forest of Seatos™.
Sabine and Shin go off to fight while Ahsoka stares down Marrok. I love all of these lightsaber battles we’ve been getting, and the scenery here, in particular, is gorgeous. Look at those vivid blades clashing in the darkness!
Marrok does a cool spinning trick with his red saber while Ahsoka waits for the prime moment to strike. When she does, we see she leaves a gash in her wake. Green smoke emits from said gash on Marrok’s side. He seems to evaporate in death, leaving behind nothing but his suit. Guess what, folks? Ol’ Marrok was a Nightbrother™, just as Morgan is a Nightsister™. Shin looks shocked when she witnesses Marrok’s death. Hey, Ahsoka didn’t come to play.
Meeting Baylan

Sabine continues fighting Shin while Ahsoka makes a beeline for the enemy’s ground base. Morgan leaves to oversee final matters before their departure on the Eye of Sion™. Baylan remains behind to protect the map. Of course, he’s not alone anymore. When Baylan senses Ahsoka’s presence on the sidelines, he remarks about how Anakin Skywalker spoke highly of her before he became Darth Vader™.
Baylan also pulls back the veil somewhat regarding his mission. He believes unleashing Thrawn, who will bring about war, is for the greater good. Sometimes, you have to destroy to create. Baylan tries to get Ahsoka to reveal why she left Anakin; however, she’s not there to discuss her past. Ahsoka raises her lightsaber. Baylan does the same, commenting on how her response to their interaction is inevitable — the Jedi love to fight.
A Legacy of Death and Destruction
Meanwhile, Morgan learns from one of her droids that they’re minutes away from getting the hyperspace coordinates. Sabine tries to use the Force on Shin but fails. She’s not there yet. Baylan declares Ahsoka’s legacy, like Anakin’s, is “one of death and destruction.” Pssht. Yeah, right. Sabine resorts to her Mandalorian suit technology, blasting at Shin multiple times. Shin retreats.
During their fight, Ahsoka grabs the map. Unfortunately, it burns her hand, so she drops it. The two continue battling it out. Morgan learns of a disruption in the coordinate-fetching process and hopes Baylan will get it back on track. Ahsoka and Baylan fight until they’re standing on the cliff’s edge, with the waters roaring below them. Shin tries to help Baylan, but Ahsoka uses the Force to slam her into a rock. Sabine arrives right as Baylan pushes Ahsoka off the cliff. She screams for her master.
Separation

Then, Sabine reaches for the map, hellbent on destroying it. Baylan urges her to do so, like her master wanted. But he swiftly changes tactics, hoping to appeal to Sabine’s love for Ezra. Baylan gives her his word that she’ll see Ezra again if she joins them. He inches closer as he reassures her that no harm will come to her. He asks for the map. Feeling resigned, Sabine reluctantly hands over the map. Shin rises to her feet after Ahsoka knocked her out. She uses the Force to choke Sabine. However, her master stops her, claiming he intends to keep his word to Sabine. He will reunite her with Ezra.
Later, Huyang fixes the comms on the Fulcrum. Hera contacts the ship, and Huyang fills her in on the situation. We see Hera, Carson, and their ships flying toward Seatos.
Baylan sets the map in its place, resuming the extraction of hyperspace coordinates. It’s go-time.
Leaving Them Battered and Bruised

Carson orders his team to prepare for battle. However, his crew notes that Morgan isn’t sending any fighters to attack them. So, they simply block the Eye of Sion’s path. I love how the scenes inside the starfighters look like they’re plucked from the original trilogy. The vintage feel makes me happy. Baylan and Shin bring a handcuffed Sabine to Morgan, who doesn’t ask questions. They prepare to launch into hyperspace.
After the Eye of Sion zooms away, Carson and Hera’s fighters take a massive hit, with a trail of destroyed ships in the wake of the hyperspace departure. Hera’s vessel seems to be functional, though. Jacen tells his mother that he has a bad feeling about all this.
Then, Huyang emerges from the Fulcrum as he calls out for Ahsoka and Sabine. He fixed the engines. They’re ready to fly. Unfortunately, all he gets is silence.
World Between Worlds

Meanwhile, we see the cliff where Ahsoka fell and the raging waters below it. The scene seamlessly transitions into a closeup of Ahsoka lying in space. She’s in the World Between Worlds. We’re finally getting the live-action version of this, and it’s glorious. She hears a voice calling her, referring to her as “Snips,” which was Anakin’s nickname for her. “I didn’t expect to see you so soon,” the voice says. Ahsoka slowly rises to her feet and whirls around, locating the source of the voice.
It’s none other than Anakin himself. He smiles at his former apprentice. As the screen goes to black, we hear Vader’s theme playing. Oof. Creepy.
Do you think Anakin is alive here, and he’s a time traveler? How will Ahsoka leave the World Between Worlds and save Sabine?
Star Wars social media has announced that Episode 5 of Ahsoka will be screening in select theaters as a part of the midseason Tano Tuesdays celebration. This will be the first time a new Star Wars project has premiered in theaters since Episode 9: The Rise of Skywalker. With the revelations and cliffhangers of this latest episode, it’s no surprise Episode 5 will probably be a big one! Check out the announcement and screening locations below. Are you excited?
Next #TanoTuesday, experience Episode 5 of @AhsokaOfficial on the big screen.
— Star Wars (@starwars) September 6, 2023
Click below to RSVP for available screenings near you: https://t.co/zfeKbbvMvf pic.twitter.com/PUROkoTNwx
Become one with the Force with other fans at side.show/geekgroup or in the Sideshow Social Network, and don’t forget to Let Your Geek Sideshow!
By Melody McCune

Connect with Melody
More from Melody
- Lanterns Season 1 Finale Review: Fear Is Power
- 10 Non-Gory Halloween Movies for a Macabre Marathon
- 12 Halloween-Themed Disney Movies to Get Your Spooky On
- The Top 10 Halloween Movies from the ’90s
- Tuning in to the 5 Best MCU Live-Action TV Shows
✍️ Written by Humans, Not AI
Related Products